


A Practical Workflow for Consistent Reference-Guided AI Image Editing
Reference images are useful because they let an AI image model inherit visual decisions that are difficult to describe precisely: the shape of a product, the spacing of a room, a character's clothing, or the lighting of a campaign. The difficult part is not adding references. It is deciding what each reference is allowed to control.
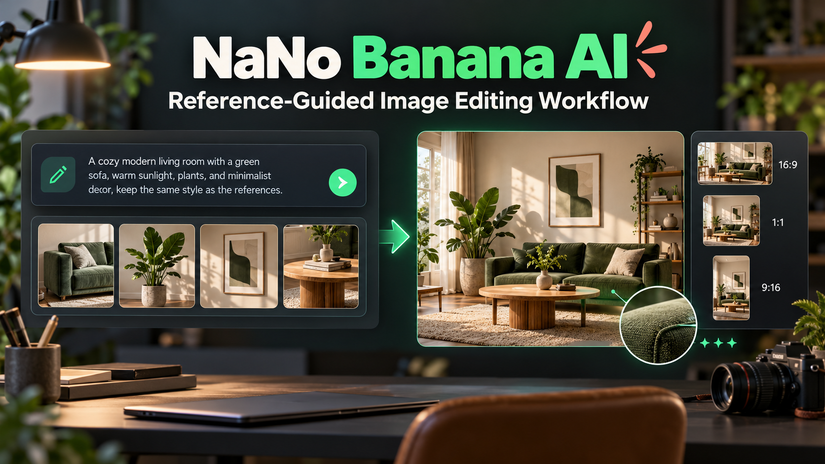
A reliable process treats image generation as a sequence of constrained edits rather than one large prompt. I used NaNo Banana AI as the working environment for the examples below because it supports text-to-image generation, multi-reference inputs, iterative editing, multiple aspect ratios, and 1K, 2K, or 4K output in the same browser workflow.
Why Reference-Guided Results Drift
A model receives several kinds of information at once: the written prompt, every reference image, the current canvas, and the previous edit history. When those signals compete, the model has to guess which one matters most.
Common symptoms include:
- a product changing shape after the background is edited;
- a character's face or clothing drifting between variations;
- a reference style overriding the requested composition;
- text becoming less readable after several revisions;
- details from unrelated references being merged into one object.
The solution is to make the job smaller and more explicit.
1. Give Every Reference One Role
Before uploading anything, label each reference by purpose. A simple reference map prevents contradictory instructions.
| Reference | Role | What it may control |
|---|---|---|
| A | Subject | Product shape, character identity, or key object |
| B | Composition | Camera angle, framing, and object placement |
| C | Style | Color treatment, texture, and rendering style |
| D | Detail | Material, typography, or a small accessory |
Do not ask one image to control everything unless it is genuinely the target you want to reproduce. If two references disagree about perspective or lighting, say which one wins.
A useful prompt sentence is:
Use reference A only for the product shape, reference B only for composition, and reference C only for color and lighting. Do not copy objects from B or C.
This wording separates content from appearance and reduces accidental blending.
2. Write a Constraint-First Prompt
Long descriptive prompts often bury the rules that matter. Put non-negotiable constraints before decorative details.
A practical structure is:
- Preserve: what must remain unchanged.
- Change: the single thing being edited now.
- Guide: which reference controls the change.
- Exclude: what must not be introduced.
- Output: aspect ratio, resolution, and final use.
For example:
Preserve the sofa shape, fabric texture, and camera position from reference A. Replace only the wall and floor using the warm minimalist style of reference B. Do not add people, text, or extra furniture. Output a 16:9 marketing image.
This is easier for a model to follow than a paragraph that mixes subject, mood, camera, and output requirements without priority.
3. Separate Structure, Style, and Detail Passes
Trying to solve composition, identity, lighting, typography, and finishing in one generation creates too many moving parts. A staged workflow is more stable.
Pass 1: Lock the structure
Choose the subject, camera position, crop, and major object placement. Ignore small imperfections. The goal is to establish a frame that can survive later edits.
Pass 2: Lock identity or product geometry
Check the features that should remain consistent: silhouette, proportions, face shape, packaging, logo placement, or distinctive accessories. If they drift, correct them before adding style.
Pass 3: Apply style and lighting
Introduce palette, material treatment, time of day, and rendering style. Tell the model to preserve the structure from the previous pass.
Pass 4: Repair local details
Fix hands, edges, text, reflections, shadows, and small objects one area at a time. Local instructions are less likely to damage the whole image.
Pass 5: Export
Only after the content is stable should you choose the final aspect ratio and higher resolution. Upscaling an unstable draft only makes the defects larger.
4. Use Fewer References Than the Limit
Support for many reference images is helpful, but the maximum is not a target. Each extra image introduces another visual signal.
Use one reference when identity is the only requirement. Use two or three when subject, composition, and style must come from different sources. Add more only when every image has a clear, non-overlapping purpose.
If an output starts borrowing the wrong object or texture, remove the weakest reference before rewriting the entire prompt.
5. Build Aspect-Ratio Variants From a Master Image
Generating 16:9, 1:1, and 9:16 versions independently often produces three different scenes. A better approach is to create one approved master image and derive the other formats from it.
For each variation:
- preserve the subject and main lighting;
- extend or crop the background rather than regenerating the subject;
- state where the subject should sit in the new frame;
- reserve negative space for captions or interface elements;
- compare the variants side by side before final export.
This method is especially useful for campaign assets that need to feel like one family across web, social, and mobile placements.
Practical Example: A Product Scene
Suppose the goal is a small campaign set for a chair. Start with one clean chair image as the subject reference and one room image as the composition reference.
- Generate a 16:9 master scene while preserving the chair's silhouette and upholstery.
- Correct perspective and floor contact before changing the color palette.
- Apply warm afternoon lighting without changing the camera.
- Create a square version by expanding the sides and moving secondary decor.
- Create a vertical version by extending the wall and floor while keeping the chair at the same scale.
- Export final assets only after all three versions pass the same checklist.
A Nano Banana 2.1 image editing workflow is particularly useful here because the same reference set can be reused across follow-up edits instead of rebuilding the scene from scratch.
Quality-Control Checklist
Before accepting a result, verify:
- Subject: shape, identity, proportions, and distinctive details match the reference.
- Composition: camera angle and object placement match the intended format.
- Edges: hair, fabric, glass, and product boundaries are clean.
- Lighting: highlights and shadows agree with the environment.
- Text: spelling, spacing, and alignment are readable at actual size.
- Consistency: no new object or texture appeared during the last edit.
- Output: aspect ratio and resolution match the delivery channel.
Common Failure Modes
| Problem | Likely cause | First fix to try |
|---|---|---|
| Identity drift | Too many competing references | Keep one identity reference and restate preservation rules |
| Wrong composition | Style reference dominates | Assign composition to a separate reference explicitly |
| Unwanted objects | References contain distracting elements | State what each reference must not contribute |
| Typography damage | Text was added too early | Finalize composition first, then repair text locally |
| Inconsistent campaign set | Each format was generated independently | Derive all formats from one approved master |
Final Takeaway
Consistency comes from controlling decisions, not from writing a longer prompt. Give each reference one role, protect important features with explicit constraints, edit in stages, and export variants from a stable master. This turns reference-guided generation into a repeatable production process instead of a sequence of lucky attempts.
All rights reserved